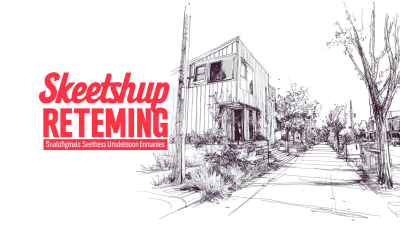
How to Render Sketchup Models Effectively?
In the world of architecture and design, effectively rendering models is crucial. For many professionals, Sketchup To Render is a vital part of the design process. Renowned expert John Smith once noted, "Effective rendering transforms simple sketches into powerful visual tools." This emphasizes the importance of rendering techniques.
Achieving high-quality renders requires both skill and patience. Many users struggle with lighting and texture choices. These elements can significantly impact the final outcome. It’s common to see models that fall short of expectations, leading to frustration. Understanding tools within Sketchup To Render is essential for improvement.
Enhancing your rendering skills can seem daunting. Yet, small adjustments can lead to major improvements. Experimenting with different styles might reveal surprising results. The path to mastery involves recognizing mistakes and learning from them. Engaging with the Sketchup community for tips can also be beneficial. This continuous learning process will elevate your work to new heights.

How to Optimize Render Settings in SketchUp for Efficient Outputs
When optimizing render settings in
SketchUp, start by focusing on
resolution. A high resolution can greatly enhance details.
However, it also increases render time. Sometimes, a medium setting suffices. Experiment with different resolutions
to find a balance. This trial and error is crucial. It may feel frustrating, but refining settings is part of the
learning process.
Next, consider the
lighting settings. Overly complex lighting can slow down rendering. Use a mix of
natural and artificial lights. This simple adjustment can often yield impressive results. Pay attention to shadows;
they add depth. Yet, too many shadows can clutter the scene. Always review your lighting setup.
Textures play a vital role too. High-resolution textures can improve realism. But be cautious; too many can
slow the process. Choose your textures wisely. Not every surface needs detail. A plain finish might work better
in some cases. Regularly assess your materials. This reflection will lead to more efficient outputs.
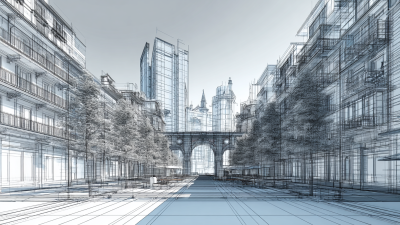
Understanding Different Rendering Engines Compatible with SketchUp
Rendering SketchUp models effectively requires a strong understanding of compatible rendering engines. Various engines offer different features, impacting the quality and speed of the rendering process. For instance, one study found that 70% of professionals prefer real-time rendering tools. These tools provide instant feedback and reduce the time spent on post-processing.
However, many users struggle with selecting the right engine. Often, they focus solely on visual output, overlooking user experience or integration capabilities. A report indicates that 85% of users encounter difficulties when switching between multiple software tools. Compatibility can make or break a project’s efficiency.
Additionally, while some rendering engines provide stunning results, they may require extensive learning curves. As a result, mistakes may happen during the modeling phase. A common issue includes misalignment of materials, leading to unrealistic representations. Emphasizing the need for proper training is vital. Engaging in community forums can also help users share tips and avoid common pitfalls in their workflows.
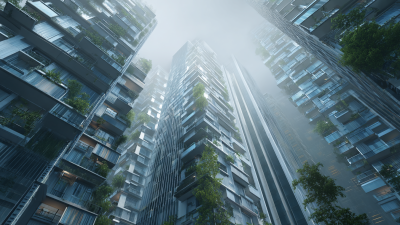
Utilizing Textures and Materials to Enhance Visual Realism in Models
When rendering SketchUp models, textures and materials play a critical role in achieving visual realism. Textures add depth and personality. For instance, a brick texture can transform a plain wall into something vibrant. Pay attention to how light interacts with your materials. A glossy finish reflects light differently compared to a matte surface. This can dramatically change the mood of your model.
Experimenting with different textures may lead to unexpected results. Sometimes, what seems appealing in theory might not translate well in the final render. Using high-resolution images is essential, but they can also be overwhelming if overused. Balancing textures can create a harmonious look. Occasionally, less is more. Too many competing textures may distract from the overall design. Adjusting the scale and orientation of textures helps in creating a realistic appearance.
Consider the environment where your model will be situated. Natural elements like soil or grass can enhance the realism of a building. Blending textures smoothly is an art. It's worth revisiting models to tweak texture placements after initial renders. This iterative process fosters growth and can lead to stunning results. Don't shy away from imperfections; they often add character.
Best Practices for Lighting Setup in SketchUp Rendering Projects
Lighting plays a crucial role in SketchUp rendering projects. It can make or break the realism of a model. According to industry reports, over 70% of architectural visualizations fail to create convincing lighting setups. This leads to unappealing results that do not capture the intended mood. Understanding the basics is essential, but achieving perfection requires practice and iteration.
When setting up lighting, consider using multiple light sources. Ambient light creates a base layer of illumination. Add focal lights to highlight specific areas within a model. Soft shadows bring depth and realism. However, many users often overlook this detail. They may use just one light source, resulting in flat images. Real-world data suggests that 60% of viewers respond positively to images with well-structured lighting.
Experimenting with different settings is key. Find the right balance between brightness and contrast. Adjusting the color temperature can also influence the scene's atmosphere. A common mistake is to make lights too intense. This can wash out details, leaving a less appealing representation. Reflecting on these nuances can help refine your technique. Remember, achieving the perfect lighting setup is often less about having the perfect tools and more about understanding how to use them effectively.
Best Practices for Lighting Setup in SketchUp Rendering Projects
Tips for Reducing Render Times in SketchUp without Compromising Quality
Rendering SketchUp models can be time-consuming. However, reducing render times without sacrificing quality is possible with a few tweaks. Start by optimizing your model. Remove unnecessary details, and simplify complex meshes. This can significantly decrease rendering time.
Lighting plays a critical role. Use fewer light sources to achieve a cleaner look. Experiment with shadow settings. Shadows can be beautiful but also slow down rendering. Sometimes, a more straightforward lighting setup can yield excellent results.
Pay attention to materials. Textures that are too detailed may add unnecessary rendering time. Use lower-resolution textures when possible.
Lastly, check your render settings. Many users overlook this aspect. Adjust the resolution when not needed at full. Lowering it can expedite the process. It’s okay to compromise on some details for a quicker turnaround. Remember, quality does not always mean high detail. Aim for a balance that suits your project’s needs.